
Sketchy Stitchy Applique
November 11, 2008 § 52 Comments
The quilt that inspired this whole sketchy stitching idea is now long gone from Flickr. I can’t even link to it. But it was sort of a scenic type quilt with trees and leaves, a park bench and flying geese blocks as geese flying in the air. The outlining or sketchy stitching was probably done by hand.
If it’s not already obvious… I am not a hand applique, hand embroidery, hand quilting kind of gal. If any of it can be done on a sewing machine, that’s where I’ll be doing it. Enter… the sketchy stitching.
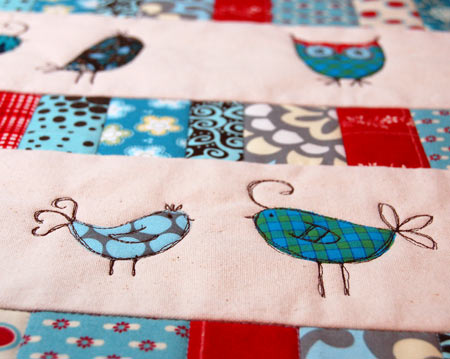
My first attempt was on the Little Acorns quilt. The next attempt was the Coneflower quilt in the Knife Edge Binding tutorial. But I think these Little Birds for the Doll Quilt 5 Swap have been the most fun. Here’s basically what I do:
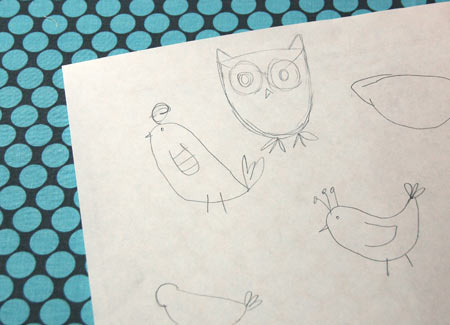
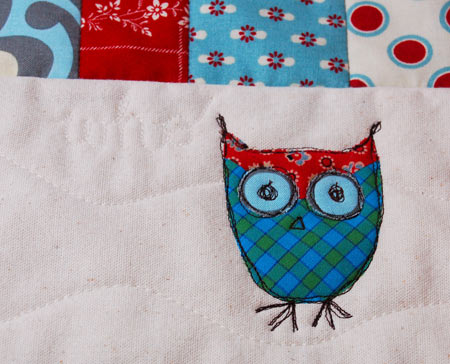
Sketch out a few ideas of what I want to applique. In this case… some birds and maybe an owl.
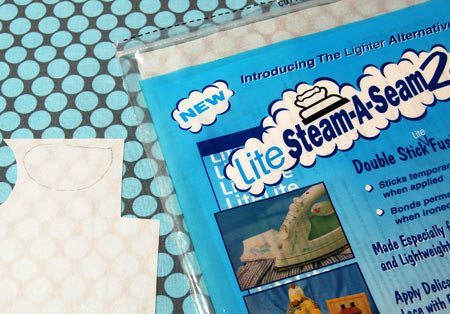
Trace the outlined shapes onto Steam-a-Seam or any other brand of fusible web.
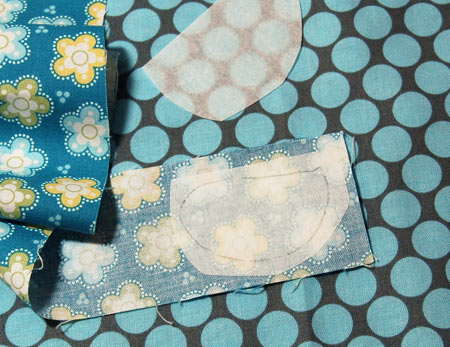
Peel off the paper from one side of the fusible web and iron it onto the wrong side of a fabric scrap.
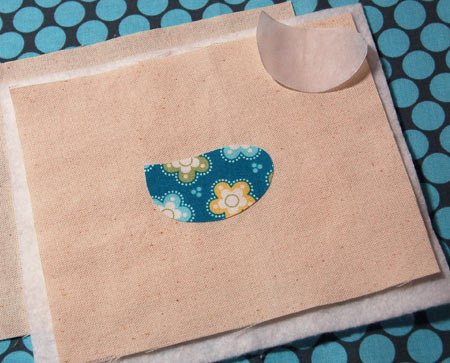
Cut out the shape from the fabric scrap and peel the paper from the fusible web. Iron the shape onto your background fabric. (The background/quilt top must be prepared first) Make a quilt sandwich with the backing, batting, and quilt top.
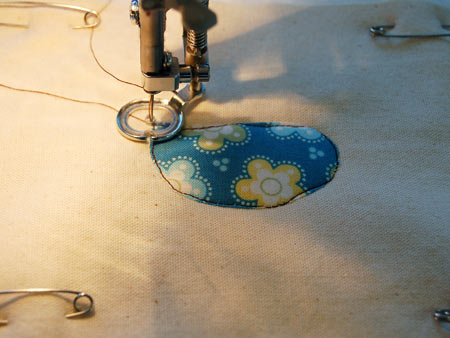
Set up your sewing machine with the darning, stippling, free motion foot… drop the feed dogs and make any other adjustments that your machine may need. My machine also has a place to reduce the pressure on the presser foot. Choose a contrasting thread color to stitch around the shape. I like using a darker brown. To me, black feels much too stark.
Stitch a couple of stitches in one place to secure the thread and then sew around the shape once.

Stitch around the shape again at least 2 or 3 more times. I try to weave back and forth from one side of the first stitching line to the other, sometimes stitching right on the fabric shape and other times stitching off the edge of it.
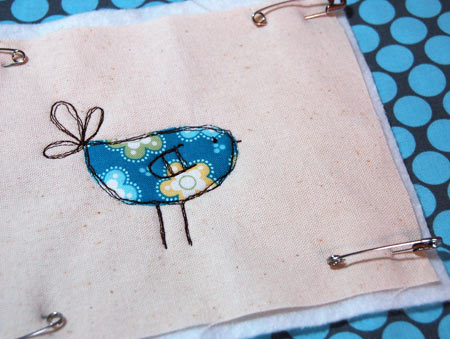
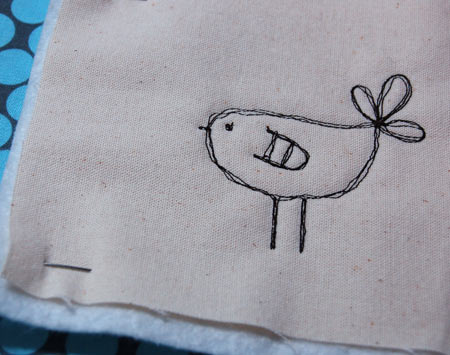
On the third or fourth time around, add the details like the feet, tail feathers and beak.
Use the same color of thread in the bobbin as on the top. If the bobbin thread is a different color, you may get little specks of that color coming up through the top of the stitching.
Once the sketchy stitching is done, I go back and fill in with any other quilting that I may want to do. On this Little Birds quilt, I first stitched in the ditch of the pieced strips. Then I did the sketchy stitching around all of the birds. And lastly, I quilted a couple of wavy lines across the bird panels.
And… as always… have fun! Don’t worry about the stitching being perfect. That’s part of the look, I think.

Wow! Awesome tutorial. I will have to give this a try. Your birds are so incredibly adorable! What a lucky person that gets your quilt for DQS5.
Oh my goodness. These are adorable!
I LOVE IT!!! Great tutorial, too. I always knew I could figure it out, but this will save some bumbling around. 🙂 Thanks!!
Wow! You make it look so easy…and very, very cute!
Love it! Thanks for sharing your technique. I’ve been scared to try applique, but I think I could do this type of thing.
Very cute! Such a great idea. Good for using scrap or making a favor fabric go far. I love this idea.
it’s truly delightful. and i’m sure far exceeds the quilt that inspired it. so lovely. i love the colors and the details, and those appliqued pieces are darling!
love this! i’m definitely trying it…right up my alley!
I love this…your design, colour choice, the quilting….its really amazing and inspiring…well done!
Great idea! your birdies are darling
Anita, your birds are just so sweet! Love your choice of fabrics. Thanks so much for showing how to do it. I must give it a try sometime.
This is lovely. Drawing with your machine, such a whimsical effect, very nice. 🙂
I love your birds – and thank you so much for your little turtorial.
I love the look – I might try it. Love to see what you are up to next.
That is fantastic! I love the technique and I’m so in love with applique but afraid of the work of it (I don’t like handwork) so this might be for me! 🙂 Thanks so much.
Oh, this is VERY cute! I am definitely going to have to try this technique. Thanks so much for sharing it with us!!!
Thanks for the tutorial, you did a great job. I absolutely love the owl.
Thanks for adding Twelve by Twelve: A Collaborative Art Quilt Project to your blog roll. Be sure to look out for our mathematics-themed quilts that are due to be revealed on 1 December US time!
I love your stitching and your birds. I attempted the same type of thing on a birdcage and heart seen here: http://www.flickr.com/photos/gingerquilts/3002401147/in/set-72157608707075335/
Those birdie are so adorable! I love the cheerful fabric, too.
Gonna have to try this technique when I figure out what project to use it on…
That is so neat, Anita! Thank you for the tutorial. I haven’t done any machine quilting…what is that little clear plastic disc?
I LOVE it! The fabric is beautiful – that 1974 polka dot is one of my favourite pieces of fabric at the moment. I’m with you on the applique – your lovely tutorial looks just my style. 🙂 And the free motion quilting is gorgeous!
Thanks so much for this fabulous tutorial!
Absolutely amazing. I must try!
SUPER cute & it actually looks do-able! Thanks for a great tutorial!
How adorable!! I love your birds and especially your owlie. I can’t wait to try this myself.
oh the preshy birdies! I’m going right now to stitch up a few. My university daughter is coo coo about birds now – there will be a little tweet – treat for her on Monday. Thank you for the perfect tutorial.
I just love this sketchy stitching technique. (And love your birds and owls.) I can’t wait to try it out. But, I need to finish the other quilt I’m working on first! It’s almost done and just needs binding, and then I can start on this project!! I can’t wait.
Thanks for this great tutorial. I tried it out myself to make some quails. If you want to check it out, here’s the link http://www.flickr.com/photos/kskovy/3528859518/
[…] on the same tutorial from Skip to my Lou, I also made a similar tote with some linen, applique and sketchy stitching as part of a contribution to the handmade craft swap at Alewives Fabric last week (amazing! super […]
[…] that I had in my stash, and some purple quilting pieces, also from my stash. Then, I used the Sketchy Stitchy Applique tutorial from Bloomin’ Workshop to make these little birds. I love the little birds! I used Heat […]
[…] I cut out chickens from the bottom fabric, attached them with Heat and Bond Lite, and then did some “sketchy stitching” around the chickens (using some stabilizer underneath). I loved how it turned out! I wanted to […]
How cute, great work!!
Great tutorial..
thanks for sharing x
Here is the link to the original inspiration picture on Flickr. http://www.flickr.com/photos/mellicious/1896943794/
Very cute with the birds.
Just wanted to let you know that I just tried this technique! I absolutely love it. Thank you so much for the inspiration. I linked to this tutorial on my blog. Hope that is okay!
Thank you ~ this is a very helpful tutorial!
how did you piece the quilt together if you sandwiched each birdie separately? did you have a whole other piece of fabric on the back or what?
casual and funky….love it!!!!!
All of my applique has been hand sewn, blanket stitch, which I love, but….wow! this is sooo adorable! Trying this technique out on my next project. Thanks!
I LOVE it!!!!!
Wonderful – thank you!
I do a lot of machine applique and love it. This is a completely different look from what I’ve done. I’ll definitely give it a try!
This is amazing!! I love hand applique as it gives a rustic look to a quilt…but this!! Definitely going to give it a go. I think I will try chooks and a rooster, but I really love the birds too. They will be on a quilt too soon!
This is amazing – makes me want to rummage through my material and ‘try’ to do something as creative as this. I love it.
Very cute ! I’ll be trying this for sure!
Thank you for an awesome tutorial! Much appreciated. 🙂
Check out this lady… She does a lot of this. amazing!
http://dontlooknow.typepad.com/dont_look_now/
[…] I used the free motion applique technique in order to give the image a ‘sketchy’ looking style. It is great fun and a little bit tricky to start with, but the important thing to remember is that it’s not meant to be perfect! You can find a great tutorial on this technique here. […]
Reblogged this on Emmalee Shallenberger: Graphic Designer and commented:
That’s pretty cool. I’m trying to attach leaves to my family tree quilt. This idea might do the trick. 🙂
Do you do your own quilting on the larger pieced quilts too with your regular sewing machine. If so, do you have a post on what and how to do that.
[…] blown free motion master class (you can get excellent ones already at The Sewing Directory & Bloomin Workshop :, or why not sign up to Sam Malloy’s class at Fabric HQ). But you can download for free the […]
[…] for me at all and the design just wasn’t coming together. It wasn’t until I found this tutorial by Anita from Bloomin’ Workshop that I got some inspiration and try out adding some scrappy […]